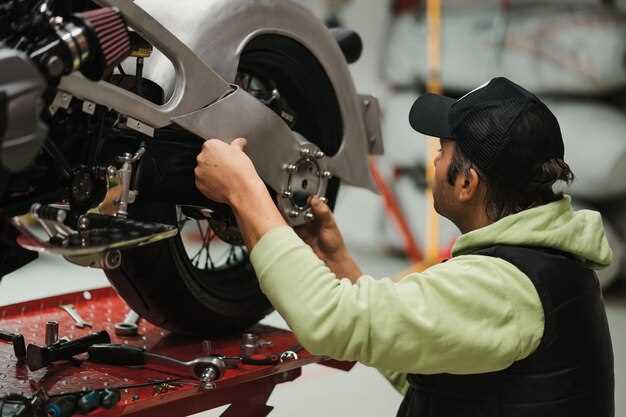
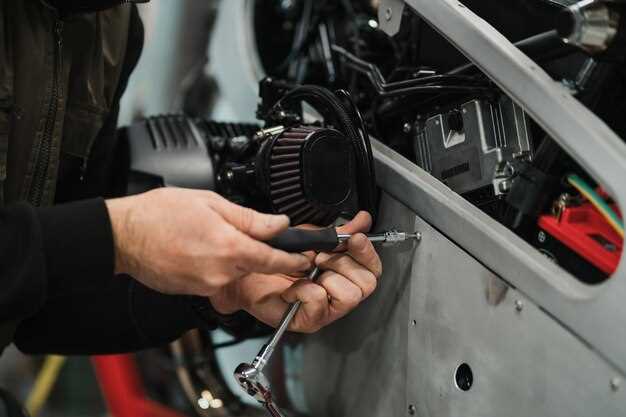
First, gather your tools. A well-equipped workspace sets the foundation for success. Essential tools include a socket set, torque wrench, screwdrivers, and pliers. Organize your area for easy access. This saves time and helps maintain focus.
Next, outline your design. Sketch your vision on paper or use design software. Specify the type of vehicle you want, from muscle cars to classic builds. Research different styles and components to create a clear blueprint. This step influences every future decision.
Choose your base vehicle wisely. Select a car that aligns with your vision and budget. Consider factors like the availability of parts and compatibility with your planned modifications. Popular choices include older chassis for classic styles and newer models for modern upgrades.
Once you have your base, start gathering parts. Source them from reputable suppliers or salvage yards. Explore online marketplaces for rare components. Keep an inventory list to avoid missing any essential items during assembly.
As you begin the assembly, follow your blueprint closely. Document each step with photos or notes. This not only tracks your progress but also allows for easier troubleshooting down the line. Regularly check for alignment and fit during this phase.
Finally, don’t rush the finishing touches. Paint and interior work play a significant role in your car’s final presentation. Choose colors and materials that reflect your style, and ensure everything is polished and functional before hitting the road.
Choosing the Right Platform for Your Custom Car
Select a platform that suits your goals and skills. Consider popular options such as chassis setups, frame kits, and donor vehicles. Each offers unique advantages depending on your project scope and experience level.
| Platform Type | Advantages | Ideal For |
|---|---|---|
| Chassis Kits | Customizable design, complete components, easier assembly. | Beginners or enthusiasts looking for streamlined builds. |
| Frame Kits | Stronger foundation, allows for unique design choices. | Experienced builders wanting a robust base. |
| Donor Vehicles | Integrated parts, familiarity with existing systems. | Cost-effective options for practical project builders. |
Evaluate your budget next. Chassis kits and frame kits can vary in price, while donor vehicles may offer more economical choices. Ensure that the cost aligns with your budget and personal vision.
Next, assess the intended use of your custom car. Whether for daily driving, racing, or show purposes, clarity on this aspect influences your platform choice significantly. Racing demands performance-oriented platforms, while show builds may prioritize aesthetics and detail.
Consider available resources. Access to tools, workspace, and expertise can guide your decision. If you have a limited workspace, a kit that requires less assembly might be preferable.
Research community support. Online forums, local clubs, and social media groups provide valuable shared experiences and advice. Platforms with a strong support network can simplify troubleshooting and enhance your build experience.
Test fit capabilities with mock-up assemblies. Before finalizing your platform, assess how various components fit together. This hands-on approach helps identify compatibility issues early in the process.
Finally, commit to your choice with a long-term vision. Each platform has the potential to evolve into something unique. Select a foundation that inspires your creativity and fits your automotive aspirations.
Finding and Sourcing Quality Parts
Begin your search by identifying reliable suppliers. Research local auto parts stores, online marketplaces, and specialized retailers that focus on your specific make and model. Look for retailers with positive customer reviews and robust return policies. Recommendations from fellow car enthusiasts can also lead you to trusted sources.
Next, consider aftermarket parts if you’re looking for performance upgrades or unique modifications. Aftermarket suppliers often offer enhanced features and better pricing. Verify the quality by checking manufacturer credentials and warranty options. Brands with a solid reputation usually provide parts that meet or exceed OEM standards.
Online platforms like eBay and Amazon can be treasure troves for hard-to-find components. Use filters for condition and seller ratings to ensure you’re sourcing quality items. Engage with the seller for any clarification on the part’s history and compatibility with your project.
Explore salvage yards for rare or vintage parts. Many yards maintain inventories of quality items. Visiting in person allows you to inspect parts thoroughly. Make a list of what you need before your visit to stay focused and efficient.
Don’t shy away from communities and forums dedicated to car building. These platforms often have buy/sell sections where enthusiasts post parts at competitive prices. Networking with members can also yield leads on where to find specific parts.
This approach maximizes your chances of sourcing quality components at the right price. Keep records of your suppliers and parts used, aiding future projects and repairs.
Designing Your Car’s Aesthetic and Functional Features
Prioritize functionality in your design. Each feature should enhance the driving experience while reflecting your style. Research ergonomic layouts and select options that heighten comfort and accessibility.
- Choose a Theme: Decide on a cohesive style–sporty, classic, futuristic. This will guide your color schemes, materials, and shapes.
- Color Selection: Opt for a color palette that speaks to you. Consider how colors can affect perceptions and moods.
- Material Choices: Balance aesthetics with durability. Combine high-quality fabrics for upholstery, weather-resistant surfaces, and lightweight alloys for body parts.
Integrate technology smoothly. Innovative gadgets should complement the design without cluttering it. Simple interfaces and responsive controls improve usability.
- Infotainment Systems: Select intuitive systems with voice commands for minimal distractions.
- Lighting: Use ambient lighting strategically to create mood and improve visibility. LED strips can enhance the interior’s appeal.
- Safety Features: Include advanced systems like lane-keeping assist and adaptive cruise control. These enhance not only safety but also user confidence.
Think about storage efficiency. Design compartments that cater to your needs. Thoughtful touches like hidden storage or modular components keep the space organized and functional.
- Customizable Settings: Allow adjustments for seating positions, climate control, and multimedia preferences, making the car feel uniquely yours.
- Exterior Modifications: Integrate functional accessories like roof racks or tow hitches that don’t compromise your car’s aesthetic.
Test your concepts through sketches or digital models. Gather feedback to make informed decisions, ensuring each feature aligns with your vision and requirements. This iterative process is key for a successful design outcome.
Assembling the Chassis and Drivetrain Components
Begin assembly with the chassis. Ensure the frame is aligned correctly using a level. Utilize a torque wrench to fasten all bolts to the manufacturer’s specifications, preventing misalignment and ensuring structural integrity.
Next, install the suspension components. Attach upper and lower control arms securely to the frame, then insert coil springs or air suspension as planned. Check for smooth movement and proper clearance. This setup affects ride quality and handling.
Move on to the drivetrain. Start with the transmission. If applicable, use adapters to connect the transmission to the engine. Ensure that all transmission mounts are in place and tightened to the specified torque settings.
- Check fluid levels before installation.
- Connect any linkages or hoses required for operation.
Install the driveshaft next. Align it with both the transmission output and rear differential. Adjust angles to meet manufacturer recommendations, which aids in minimizing vibration during driving.
- Install the rear differential, aligning it with the driveshaft.
- Secure mounting hardware and ensure proper fluid is filled.
Next, connect the axles. Depending on your design, you may use bolt-on or slip-in axles. Ensure each is inserted completely and fastened correctly to avoid drivetrain failures.
Finally, double-check all connections, bolts, and fittings throughout the chassis and drivetrain. Look for any signs of wear or misalignment, correcting before proceeding to further assembly stages.
Integrating Electrical Systems and Custom Wiring
Begin with a solid plan for your electrical system layout. Use a wiring diagram specific to your vehicle model or design to visualize connections, ensuring every component has a designated place. Integrate high-quality wiring harnesses to simplify installation, reducing the risk of shorts or failures.
For optimal performance, choose appropriate gauge wire based on the electrical load of each component. Lighter loads can use 18-20 gauge wire, while heavier loads may require 10-12 gauge. Keep lengths to a minimum, avoiding unnecessary loops that can introduce resistance.
Label all wires and connections clearly. Use heat shrink tubing to protect exposed areas and solder connections for durability. This practice not only ensures reliability but also streamlines troubleshooting in the future.
Incorporate a fuse block in your system to protect individual circuits. Select fuses carefully, rating them slightly higher than the expected load to avoid nuisance blowouts. Invest in a reliable ground system; use common grounding points to minimize resistance, ensuring all electronics operate smoothly.
Pay attention to routing wires. Keep power wires separate from signal wires to reduce interference, especially when dealing with sensitive components like audio systems or navigation. Use zip ties and clips to secure cables neatly, preventing damage and tangling.
Consider additional features like a battery disconnect switch for safety during maintenance. Integrate relays for high-current devices to prevent overload on switches. This will help maintain the lifespan of your electrical components and ensure your custom car runs reliably.
Test each system thoroughly after installation. Start with the primary functions and gradually check every component, addressing issues promptly. Document your wiring setup and any modifications made for future reference.
Testing and Tuning Your Custom Build for Performance
Begin testing with a controlled environment. Find a safe location that allows for accurate measurements, such as a closed track or a dedicated testing facility. Gather essential tools, including a diagnostic scanner, a stopwatch, and performance-monitoring software to track metrics.
Check the engine’s performance first. Use a dynamometer to obtain accurate power and torque readings. Compare these figures to your build specifications. Adjust fuel mixtures and air intake settings to optimize combustion efficiency.
Evaluate the suspension system next. Conduct tests for handling and stability. Adjust ride height and damping settings to achieve a balance between comfort and performance. Experiment with different shock absorber configurations to find the ideal setup for your needs.
Address braking performance by assessing stopping distances from various speeds. Upgrade components such as brake pads or rotors if necessary. Ensure that brake fluid is at the recommended level and in good condition to maintain reliability.
Monitor tire performance under different conditions. Test various tire pressures for optimal grip. Use high-performance tires that suit your driving style and the environment. Track how tire wear responds to different driving techniques.
Finally, continuously monitor and log data during each test run. Adjust settings based on findings and cross-reference results to identify trends. Iteratively refine your design for peak performance, ensuring that each modification results in measurable improvements.


