Prepare your car for a fresh new look by gathering the right tools and materials. Begin with a quality primer, automotive paint, clear coat, sandpaper, and masking tape. Each component plays a significant role in achieving a professional appearance.
Ensure the painting area is well-ventilated and free from dust. To prevent unwanted particles from ruining the finish, clean the surface thoroughly and remove any rust or old paint. A detailed preparation sets the foundation for better adhesion and durability.
After priming, apply the first coat of color, using even strokes and maintaining a consistent distance from the surface. Allow sufficient drying time between coats to avoid runs and ensure a smooth finish. Finish with a clear coat for enhanced shine and protection from environmental factors.
Keep an eye on the weather conditions. A humidity level below 50% and temperatures between 60°F to 80°F are ideal for painting. This ensures the paint dries properly and adheres well, resulting in a stunning finish.
Once completed, let your masterpiece cure for a few days before exposing it to any harsh elements or washing. Regular maintenance will help maintain that impressive look for years to come.
Choosing the Right Paint for Your Vehicle
Select a polyurethane-based paint for durability and a high-gloss finish. This type of paint provides excellent resistance to scratching and weathering, ensuring your vehicle looks polished for years.
If you prefer a more budget-friendly option, consider acrylic enamel. It’s user-friendly for beginners and dries quickly, allowing you to complete your project without long waiting times. However, be aware that it may not offer the same longevity as polyurethane.
For a professional touch, look into automotive urethane paint. This paint can give a hard, glossy surface while adhering well to various substrates. It requires a bit more skill but delivers stunning results.
Consider the color and finish that fits your style. Metallic paints often provide a striking look but may require clear coat application to protect the finish. Solid colors, on the other hand, are easier to maintain and repair.
Lastly, keep in mind that using a paint with a compatible primer is crucial. This ensures better adhesion and a smoother finish. Check the manufacturer’s recommendations for compatibility between paint and primer for the best results.
Preparing Your Car’s Surface for Painting
Clean the surface thoroughly using soap and water to remove dirt, grease, and old wax. A clean surface ensures proper adhesion of the paint. Rinse and dry the car completely to avoid trapping moisture under the new paint.
Next, inspect for any imperfections. Sand down rust spots and smoothen scratches with sandpaper. Start with a coarse grit (around 80-120) for rough areas and finish with a finer grit (220-320) for a smooth surface.
Use a paint stripper for areas with heavy old paint. Apply it according to the manufacturer’s instructions, allowing it to penetrate before scraping away the unwanted layers. After stripping, sand the area to achieve an even texture.
Mask off areas you don’t want to paint, such as windows, tires, and trim. Use painter’s tape and plastic sheeting to cover these sections. This step saves time and ensures precision during painting.
Once prepped, wipe the surface with a lint-free cloth dampened with a wax and grease remover. This final cleaning removes any remaining contaminants that could interfere with the paint application.
Finally, inspect the surface one last time to ensure it’s smooth and clean. Proper preparation sets the stage for a flawless paint job. Take your time with this step for the best results.
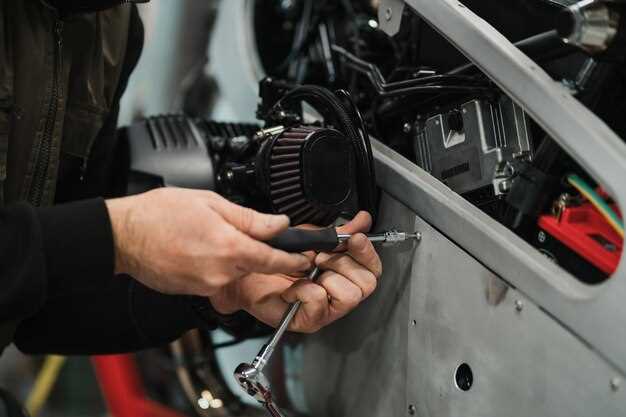
Essential Tools and Materials for a DIY Paint Job
Gather a high-quality spray gun for an even application of paint. Choose one that matches the type of paint you plan to use, such as solvent-based or water-based. Don’t forget a reliable air compressor to power your spray gun, selecting one that meets the recommended PSI for your tool.
Invest in a complete masking tape set. This ensures clean lines and prevents paint from getting onto unwanted areas. Use painter’s tape specifically designed for automotive applications for the best results.
Prepare for surface prep with sandpaper in various grits. Start with a coarser grit to remove old paint and follow up with finer grits for a smooth finish. Include a sanding block for better grip and control during the sanding process.
Purchase a quality primer for better paint adhesion and durability. Choose a primer compatible with your selected paint type. A spray primer can save time, providing even coverage on large surfaces.
For paint, select automotive-grade paint that suits your desired finish, whether it’s glossy, matte, or metallic. Check that the paint is compatible with your primer for optimal results.
Equip yourself with a clear coat to protect your paint job from UV rays and scratches. A high-gloss clear coat not only adds durability but enhances the depth of the paint’s color.
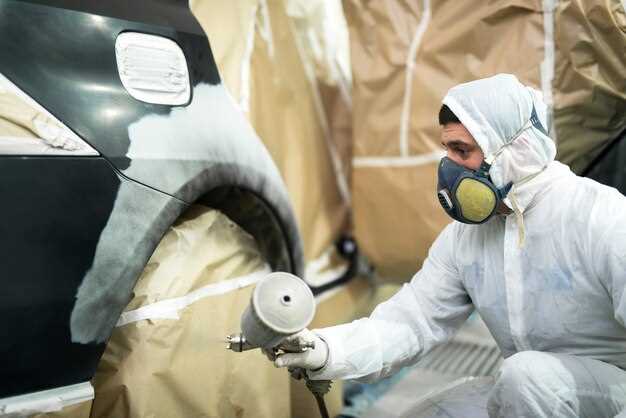
Don’t overlook personal safety equipment. A good respirator mask, gloves, and safety goggles protect against fumes and splashes. Make sure your workspace is well-ventilated to create a safe environment.
Lastly, have a set of clean rags and paint thinner on hand for quick clean-ups. This not only keeps your workspace tidy but also helps avoid mistakes during the painting process.
Step-by-Step Process of Painting Your Car
Prepare your workspace by ensuring it’s clean and well-ventilated. Gather all necessary tools and materials, including paint, primer, clear coat, masking tape, sandpaper, and spray guns or paint rollers.
Wash the Car: Start with a thorough wash to remove dirt and grime. Use a degreaser to eliminate any grease, especially around the edges and under the hood.
Sand the Surface: Lightly sand the existing paint with 400-grit sandpaper. This helps the new paint adhere better. Focus on areas with scratches or rust.
Masking: Use masking tape to protect areas not being painted, such as windows, headlights, and trim. Take your time to ensure clean lines.
Apply Primer: Choose a high-quality primer suited for automotive use. Spray or roll an even coat over the sanded areas. Allow it to dry completely as per the manufacturer’s instructions.
Sanding Primer: After the primer dries, lightly sand it with 600-grit sandpaper for a smooth finish.
Base Coat: Shake the paint can or mix the paint thoroughly. Apply the base coat in thin layers, allowing each coat to dry before applying the next. Usually, 2-3 coats are sufficient for an even color.
Clear Coat: After the base coat is fully dry, apply a clear coat to protect the paint and add shine. Follow the same procedure as with the base coat, applying 2-3 layers.
Drying and Curing: Allow the car to cure for several days before exposing it to the elements. Avoid washing the car for at least two weeks to ensure the paint sets properly.
Finishing Touches: Remove masking tape carefully. Inspect for any imperfections and touch up as needed. Consider waxing the car after about a month for added protection.
Each step plays a role in achieving a professional-looking finish. Stay patient and take your time for the best results. Happy painting!
Common Mistakes to Avoid During Car Painting
Avoid skipping surface preparation. Thoroughly clean, sand, and prime the area before applying paint. Neglecting this step can lead to poor adhesion and uneven finishes.
Don’t rush the drying process. Allow adequate time between coats for the paint to dry completely. This prevents smudging and other imperfections, ensuring a smooth end result.
Watch the temperature and humidity levels. Painting in extreme conditions can affect the curing process and the overall quality of the paint job. Aim for moderate temperatures and low humidity for the best results.
Steer clear of applying paint too thickly. Multiple thin layers offer better coverage and minimize runs and drips, leading to a cleaner finish. Patience pays off here.
Invest in quality supplies. Cheap tools often lead to unsatisfactory results. High-quality spray guns, paint, and protective gear make a noticeable difference in the final look.
Avoid ignoring safety precautions. Always wear a mask, goggles, and protective clothing. Paint fumes can be hazardous, and proper ventilation is key to a safe workspace.
Keep an eye on the environment around you. Dust and debris can settle on wet paint, ruining the finish. Work in a clean, controlled area to minimize contamination.
| Mistake | Consequence | Solution |
|---|---|---|
| Skipping surface preparation | Poor adhesion | Clean, sand, and prime |
| Rushing drying time | Smudging | Allow full drying |
| Paining in extreme conditions | Inconsistent paint quality | Choose moderate weather |
| Applying paint too thickly | Runs and drips | Use thin, even layers |
| Using poor quality supplies | Unsatisfactory finish | Invest in quality tools |
| Ignoring safety precautions | Health risks | Wear protective gear |
| Working in a dirty environment | Contaminated paint | Maintain a clean workspace |
Finishing Touches: Clear Coat and Polishing Techniques
Apply a high-quality clear coat to enhance your paint job’s durability and gloss. Choose an automotive clear coat designed for spray application, ensuring compatibility with your base paint. Use a spray gun for an even application, maintaining a distance of 6-12 inches from the surface.
Layer the clear coat in multiple thin coats, allowing 10-15 minutes of flash time between applications. This method prevents runs and sagging, achieving a smooth finish. After the final coat, allow the clear coat to cure for at least 24 hours before progressing to polishing.
Once cured, start with a wet sanding technique. Use 1500 to 2000 grit sandpaper and water to wet the surface gently. This process removes any dust particles and imperfections. Rinse frequently to keep the sandpaper clean, applying light pressure for the best results.
Following wet sanding, switch to a polishing compound. A dual-action polisher makes this task easier. Apply the compound to a foam pad and work in small sections, using slow, overlapping passes. This technique restores the shine and smoothness to the clear coat.
Once the compound is applied, wipe off any residue with a clean microfiber cloth. Afterward, consider using a finishing polish for added depth and clarity. Repeat the polishing process, focusing on precision.
Complete the process by applying a good-quality wax or sealant for protection. This step adds an additional layer, helping to resist scratches and UV damage. Regular maintenance with wax will keep your paint looking fresh for years.