Identify the damage on your car and assess its severity. For minor scratches, you can often handle repairs at home with a few simple tools. Use a microfiber cloth and automotive rubbing compound; gently buff the scratched area until it blends evenly with the surrounding paint.
For deeper scratches, consider using touch-up paint that matches your car’s color. Clean the area thoroughly before applying the paint with a small brush for precision. Allow it to dry completely, then finish with a clear coat for added protection.
Dents require a different approach. Start with a hairdryer to heat the area, followed by applying aluminum foil and dry ice. The rapid temperature change can cause the metal to pop back into place. Alternatively, invest in a plastic dent-pulling kit for a more systematic solution that yields great results without damaging your car’s finish.
Always remember to maintain your car’s exterior regularly. A wax coating not only enhances shine but also adds a protective layer against future scratches and dents. Regular upkeep saves time and money in the long run.
Assessing the Severity of Scratches and Dents
Begin by visually inspecting the area to determine the extent of the damage. For scratches, check if they penetrate the clear coat or reach the paint. Light scratches typically affect only the clear coat and can often be polished out easily. Deep scratches that expose the primer or metal require more effort and may need touch-up paint.
For dents, assess if the metal is pushed inwards without breaking the paint. Minor dents can usually be popped out using tools or heat methods. If the paint has cracked or peeled, the repair will be more involved, potentially requiring a patch and repaint.
Utilize your fingernail to test the depth of scratches. If your nail catches, it indicates a deeper scratch that might need professional attention. For dents, gently push on the area with your hand. If it springs back without issue, chances of fixing it are higher. If it feels rigid or doesn’t return to shape, consider consulting a specialist.
Document each blemish with pictures from different angles. This will help gauge how the damage might evolve and guide your repair choices. Access to this data can also prove useful if you decide to seek professional advice later on.
Consider the location of the damage. Scratches and dents on a flat surface are generally easier to repair than those on curves or edges. Evaluate the overall aesthetic impact on your vehicle; significant damage may warrant more thorough restoration efforts.
Choosing the Right Tools and Materials for Repair
Invest in a quality microfiber cloth for cleaning the affected area. This cloth prevents further scratches during the repair process.
Use a dual-action polisher for polishing and buffing out minor scratches. This tool provides better control and reduces the risk of damaging the paint more than necessary.
Select a paint scratch repair kit that matches your car’s color code. This ensures a seamless blend with the existing paint and avoids noticeable patches.
Consider a heat gun for dent repairs. Applying heat gently can help make plastic-based panels more pliable, allowing for easier manipulation.
Keep a set of plastic trim tools handy. These tools help pop out dents without harming the surrounding paintwork.
Use a clear coat pen for finishing touches. It not only protects the repair but also adds shine, giving your car a polished look.
Don’t overlook sandpaper in various grits. Start with a coarser grit for deeper scratches, then progress to finer grits for a smooth finish.
Have a pair of gloves ready to maintain cleanliness and protect your hands from chemicals.
Stock up on rubbing compounds and polish. These products effectively restore the paint’s gloss after addressing scratches and dents.
Lastly, gather painter’s tape. This helps mask areas during the repair, ensuring a cleaner job without unwanted paint overspill.
Step-by-Step Process for Buffing Out Scratches
Gather the necessary materials: microfiber cloth, car polish, and a dual-action polisher or a foam applicator pad. Choose a polish that matches your car’s finish for the best result.
1. Start with a clean surface. Wash the area around the scratch thoroughly. Use soap and water to remove dirt and debris.
2. Dry the surface completely. Use a microfiber cloth to ensure no moisture remains, which can interfere with polishing.
3. Apply a small amount of car polish to the applicator pad or cloth. A dime-sized amount usually suffices. Avoid using too much product.
4. Position the applicator at a 45-degree angle to the scratch. Begin gently buffing the area. Use circular motions to distribute the polish evenly.
5. Increase your pressure gradually as needed. If using a polisher, keep it moving to prevent overheating the paint. Spend about 30 seconds on the scratch.
6. Wipe away excess polish with a clean microfiber cloth after buffing. This ensures a smooth finish without residue.
7. Inspect the scratch. If it remains visible, repeat the polishing process. Multiple applications may be necessary for deeper scratches.
8. Finish with a coat of wax. Apply wax after buffing to protect the polished surface and enhance the shine.
| Step | Action |
|---|---|
| 1 | Clean the area |
| 2 | Dry completely |
| 3 | Apply polish |
| 4 | Buff using circular motions |
| 5 | Adjust pressure as needed |
| 6 | Wipe away excess polish |
| 7 | Inspect and repeat if needed |
| 8 | Apply wax |
How to Properly Fill and Paint Dents
Begin with cleaning the dented area using soap and water. This removes dirt and grease, ensuring better adhesion for fillers and paint.
Use sandpaper to smooth out the edges of the dent. Start with a coarse grit (around 80) and gradually move to a finer grit (around 220) for a smoother finish. This step prepares the surface for filler application.
Apply a high-quality body filler to the dent. Use a plastic spreader to fill the dent, ensuring you overfill slightly to allow for sanding later. Allow the filler to cure as per the manufacturer’s instructions.
Once the filler is fully cured, sand it down using fine-grit sandpaper until it is flush with the surrounding surface. Take your time to achieve a seamless transition between the filled area and the original paint.
Clean the area again with a cloth to remove any dust from sanding. Next, apply a primer to the filled area to promote paint adhesion. Choose a primer suitable for your car’s surface and let it dry completely.
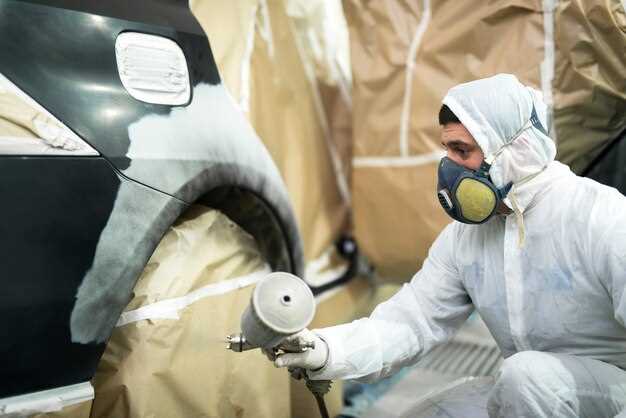
Select the right paint color for your car. Use an automotive paint that matches your vehicle’s color code. Apply multiple thin coats of paint, allowing each coat to dry before applying the next. This prevents runs and drips.
Once the final coat is dry, apply a clear coat to protect the paint and enhance shine. Let it cure thoroughly, and then polish the area for a high-gloss finish.
Finish by cleaning any overspray from surrounding areas and disposing of any materials properly. Your repair should now blend seamlessly with the rest of the vehicle.
Tips for Avoiding Future Scratches and Dents
Regularly wash your car to remove dirt and debris that can scratch the paint. Use microfiber cloths for drying to avoid fine scratches.
Park away from other vehicles in crowded areas. Choose spacious spots or end spaces to minimize the risk of door dings.
Install a car cover if you park outside frequently. This shields your vehicle from branches, hail, and other potential hazards.
Avoid parking under trees. Falling branches, sap, and bird droppings can all damage the car’s finish.
Be mindful when driving near shopping carts or other vehicles. Maintaining a safe distance reduces the likelihood of incidental contact.
Use protective film on vulnerable areas like bumpers and door edges. This transparent layer absorbs impacts and prevents scratches.
Keep your car clear of loose items. Secure or remove any belongings that could shift and scratch the interior surfaces during transit.
Regularly check your mirrors and blind spots, ensuring safe lane changes. This practice helps avoid collisions and nicks.
Educate family members on safe entry and exit. Teach them to handle doors gently to prevent slamming.
Consider ceramic coatings for added protection. These create a strong, smooth surface that resists scratches and contaminants.
When to Seek Professional Help for Repairs
If you notice severe damage such as deep scratches that reach the metal or significant dents compromising the integrity of the bodywork, it’s time to contact a professional. Here are specific scenarios where expert assistance is advisable:
- Structural Damage: If the frame of your vehicle is bent or misaligned, seek professional help immediately. Such issues can affect safety and handling.
- Paint Mismatch: If you cannot match the paint color or finish properly, professionals have access to advanced technology and color matching tools.
- Extensive Damage: For large areas with multiple scratches and dents, a specialist can restore the surface more efficiently than DIY methods.
- Insurance Claims: If you’re dealing with an insurance claim, professionals can provide the necessary documentation and estimates required by insurers.
- Time Constraints: When you’re short on time or lack the tools, a professional repair service saves you both time and effort.
Experts ensure quality workmanship and use professional-grade materials, giving your vehicle a restored look and protecting its value. Trusting professionals in these situations leads to better results overall.